This tutorial guides you through the first steps of using Anbox Cloud. You will learn how to create and access a virtual Android device or an application using the web dashboard.
The web dashboard provides an easy-to use interface to Anbox Cloud. However, it currently supports a limited set of functionality, which means that it might not be sufficient for all use cases. If you want to learn how to manage Anbox Cloud from the command line, see the Get started with Anbox Cloud (CLI) tutorial.
Preparation
If you haven’t installed Anbox Cloud or the Anbox Cloud Appliance yet, you must do so before you can continue with this tutorial. See the following documentation for installation instructions:
- How to install the Anbox Cloud Appliance
- How to install Anbox Cloud (note that you must install the streaming stack for the web dashboard to be available)
1. Create a virtual device
Let’s start exploring what Anbox Cloud can do by launching a virtual device that runs a specific Android version.
With “virtual device” we mean a simulated device that runs a plain Android operating system without any special apps installed. Technically speaking, Anbox Cloud treats such a virtual device as an “empty” application, thus an application that is not running a specific APK.
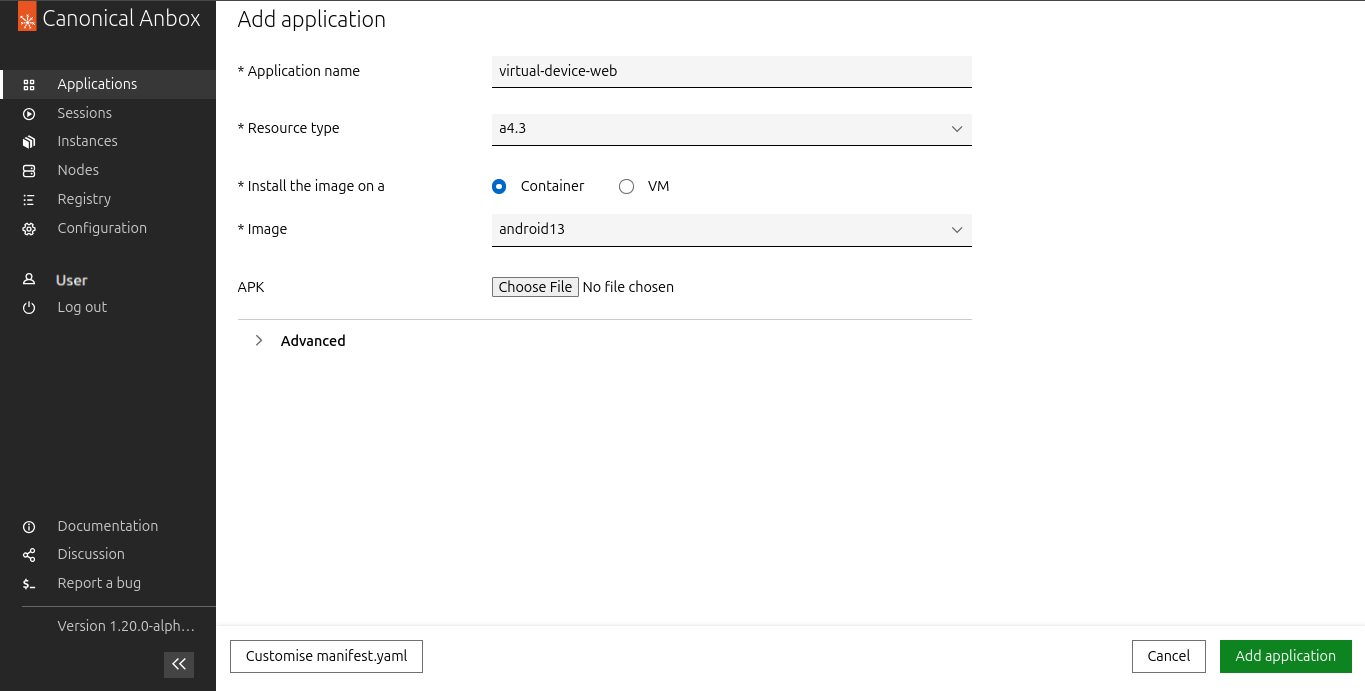
Complete the following steps to create a virtual device:
-
Open
https://<your-machine-address>/applicationsin your browser. By default, the Anbox Cloud Appliance uses self-signed certificates, which might cause a security warning in your browser. Use the mechanism provided by your browser to proceed to the web page. -
Click Add Application.
-
Enter a name for the application, for example,
virtual-device-web. -
Keep the preselected resource type.
-
Select the Android image that you want to use, for example,
jammy:android13:arm64. -
Do not upload an APK file.
-
Click Add Application.
-
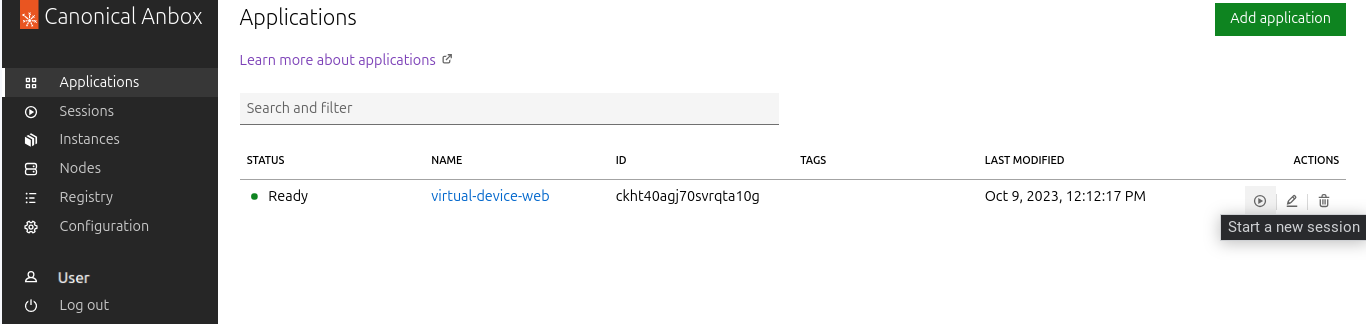
You are redirected to the application view. Wait until the application status changes to
ready.
2. Launch and test the virtual device
When the application has been initialised and its status changes to ready, complete the following steps to launch and test the virtual device:
-
In the list of applications, click the play button in the Actions column for the application to start a new session.
-
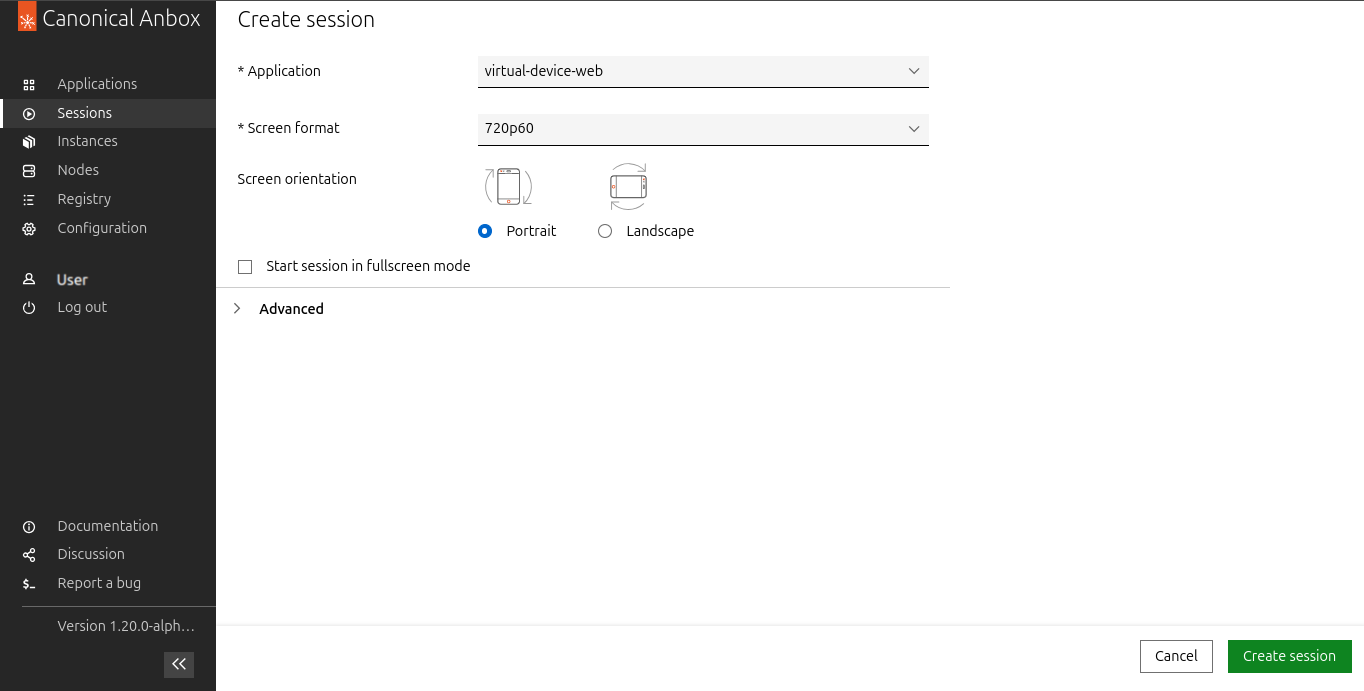
Accept the default settings and click Create Session.
-
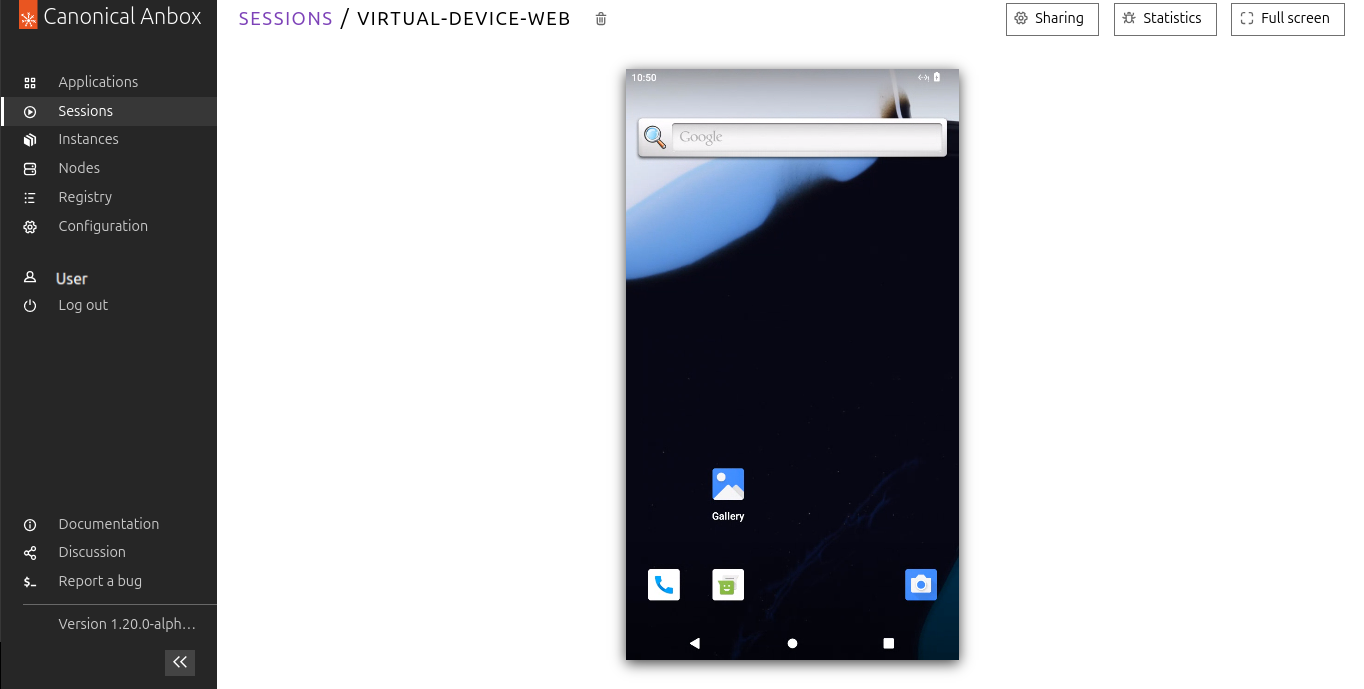
When the stream has loaded, you can interact with your virtual device.
3. Create an application from an APK
To create an application for a specific Android app, follow the steps in 1. Create a virtual device, but upload the APK of the Android app.
Not all Android apps are compatible with Anbox Cloud. See How to port Android apps for more information.
Choose a resource preset suitable for your application. If your instance is equipped with a GPU and your application requires the use of the GPU for rendering and video encoding, make sure to mention the GPU requirement using the resources attribute. Otherwise, the container will use a GPU if available or software encoding.
You can launch and test the application in the same way as you did for the virtual device.
4. Update an application
You can have several versions of an application. See How to update an application for detailed information.
Complete the following steps to add a new version to your application:
- Open
https://<your-machine-address>/applicationsin your browser. - Click the Edit application button in the Actions column next to the application for which you want to add a new version.
- Upload a new APK, or do other changes to the configuration.
- Click Update application.
5. Delete an application
While following this tutorial, you created several applications. You can see them in the application view at https://<your-machine-address>/applications.
To delete an application, click the Delete application button in the Actions column and confirm the deletion.
To skip the confirmation window, hold Shift when clicking the Delete application button.
6. Inspect instances
Every time you start a session for an application, Anbox Cloud creates an instance. The instance keeps running even if you exit the stream, until you either stop the session by clicking Stop session or delete the instance.
You can see all instances in the instance list view at https://<your-machine-address>/instances.
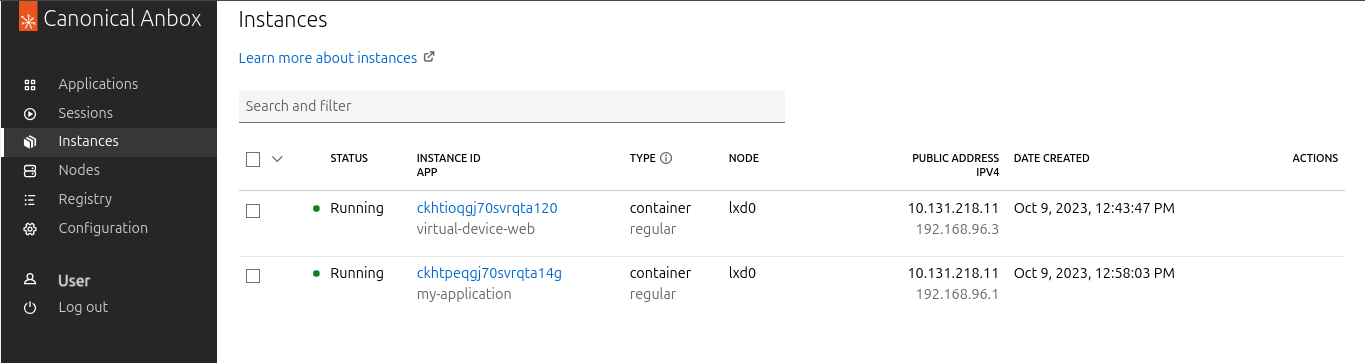
Complete the following steps to inspect an instance:
-
Click on the ID of one of the running instances. The Overview tab displays detailed information for the instance.
-
Switch to the Terminal tab. You will see a terminal for the Linux instance that runs the Android container.
You can run commands in the Linux instance, or you can enter
anbox-shellto access the nested Android container (enterexitto go back to the Linux instance).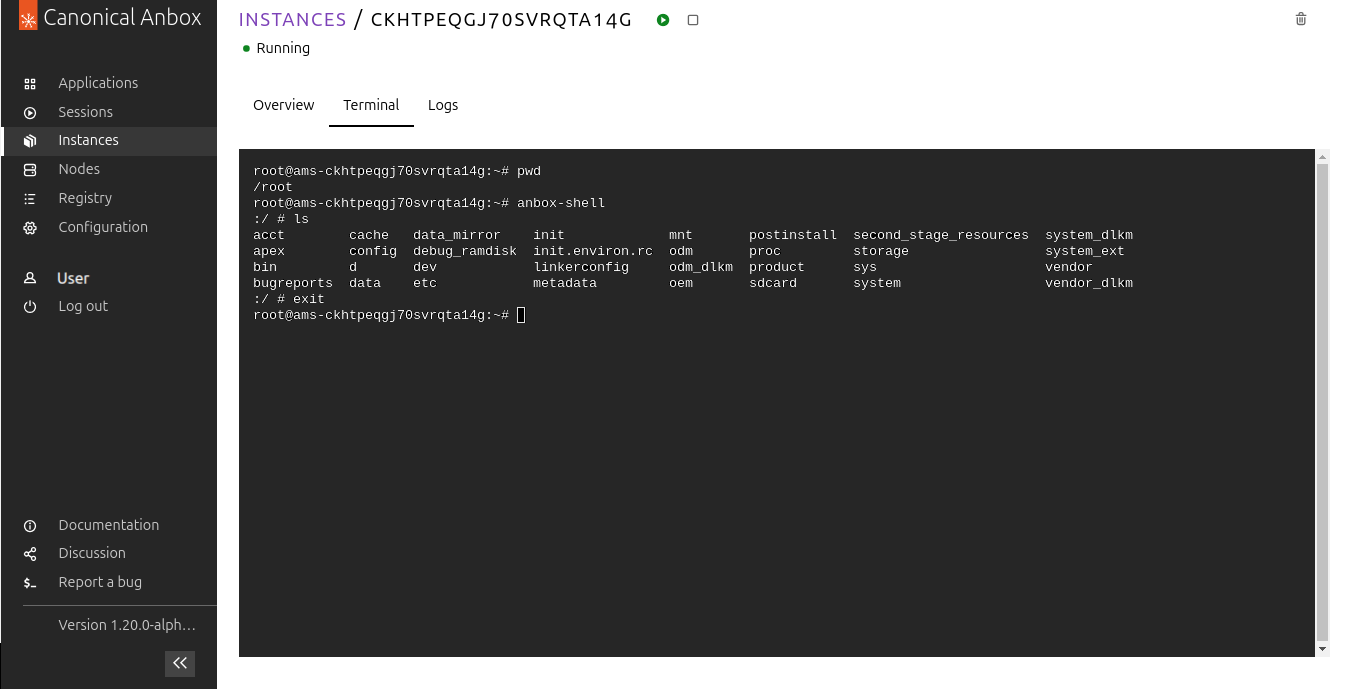
-
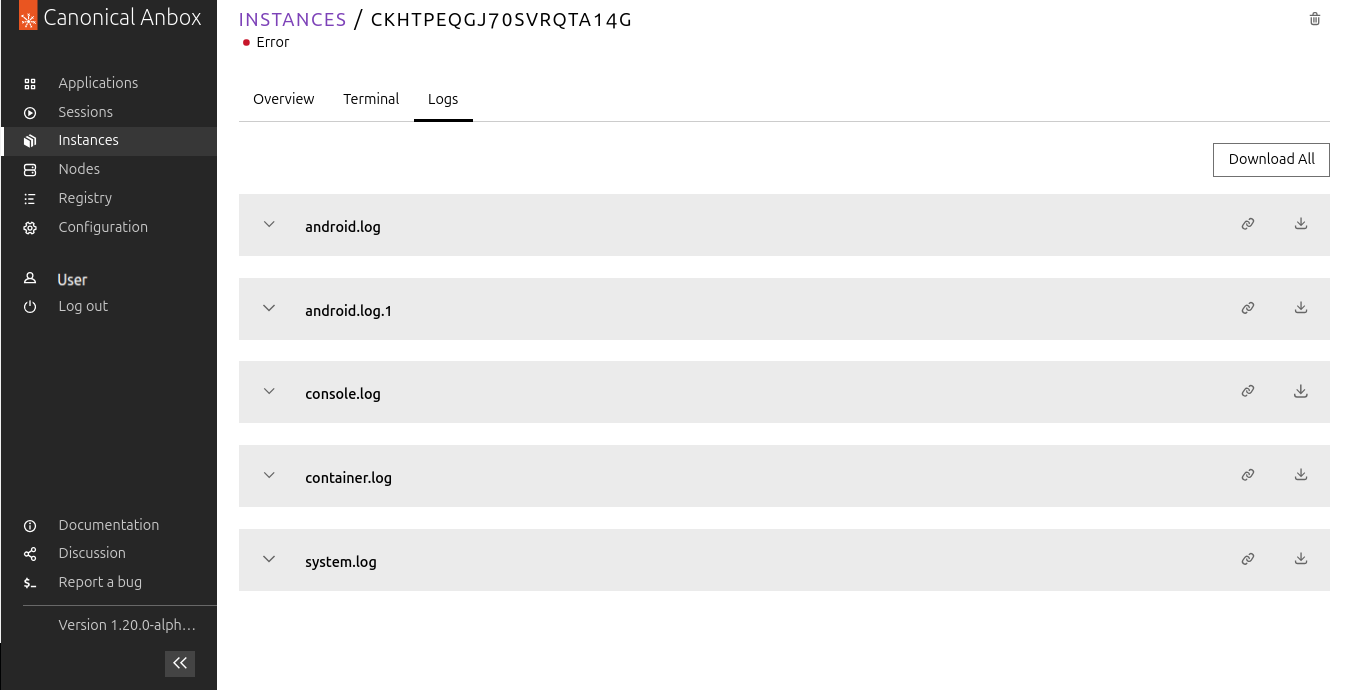
Switch to the Logs tab. You will not see any logs, because log files are available only for instances that are in an error state, not for running instances.
To simulate a failure for the instance, switch to the Terminal tab and enter the following command:
amsctl notify-status error --message="My error message"Go back to the instance overview, and when the instance status changes to error, click on the instance ID and switch to the Logs tab. You can now see the error logs for the instance.
Done!
You now know how to use the web dashboard to create, launch and test applications in Anbox Cloud.
If you are interested in more advanced use cases, check out the Get started with Anbox Cloud (CLI) tutorial to learn how to use Anbox Cloud from the command line.
Also see the documentation about How to manage applications and How to work with instances.