The Anbox Cloud Appliance provides a deployment of Anbox Cloud to a single machine. This offering is well suited for initial prototype and small scale deployments.
There are differences between the Anbox Cloud Appliance and the full Anbox Cloud installation (see Variants). This tutorial focuses on installing the Anbox Cloud Appliance on a single dedicated machine.
Remember that installing the Anbox Cloud Appliance will take over the entire instance, install packages and override existing components to configure them as required. If you have existing components, for example, LXD containers, installing and initialising the appliance could override any existing configuration. Hence, it is important to try this tutorial on a machine dedicated for Anbox Cloud.
If you want to install Anbox Cloud instead, see How to install Anbox Cloud or if you want to install the appliance on a cloud platform, see How to install the Anbox Cloud Appliance.
This tutorial guides you through the steps that are required to install and initialise the Anbox Cloud Appliance on the machine from the snap.
Check the prerequisites
Make sure you have the following prerequisites:
- An Ubuntu SSO account. If you don’t have one yet, create it here.
- A virtual or bare metal machine running Ubuntu 20.04 or 22.04. See the detailed requirements here.
- Your Ubuntu Pro token for an Ubuntu Pro subscription. If you don’t have one yet, speak to your Canonical representative. If you already have a valid Ubuntu Pro token, log in to Ubuntu Pro | Ubuntu to retrieve it.
Warning:
The Ubuntu Pro (Infra-only) token does NOT work and will result in a failed deployment. You need an Ubuntu Pro subscription.
Install the appliance
The following instructions guide you through all relevant steps to install the Anbox Cloud Appliance from the snap.
1. Update your system
On your machine, run the following commands to ensure that all installed packages on your system are up-to-date:
sudo apt update
sudo apt upgrade
2. Attach your machine to the Ubuntu Pro subscription
The Anbox Cloud Appliance requires a valid Ubuntu Pro subscription.
Before installing the appliance, you must attach the machine on which you want to run the Anbox Cloud Appliance to your Ubuntu Pro subscription. To do so, run the following command, replacing <pro_token> with your Ubuntu Pro token:
sudo pro attach <pro_token>
3. Enable the anbox-cloud service using the Ubuntu Pro client.
On your machine, run the following command to install the Anbox Cloud Appliance and additional dependencies.
pro enable anbox-cloud
Running this command does the following:
-
Installs the following tools and dependencies, if they are not installed already:
-
Important:
The Anbox Cloud Appliance requires LXD >= 5.0 and hence LXD is installed from the
5.0/stabletrack by default. If LXD is already installed but the version is earlier than 5.0, runsnap refresh --channel=5.0/stable lxdto update it. However, if LXD version is later than 5.0, do not downgrade it as it may render LXD unusable.
-
Installs
anbox-cloud-appliancesnap from thelatest/stabletrack. -
Configures the
aptrepositories for Anbox Cloud.
Initialise the appliance
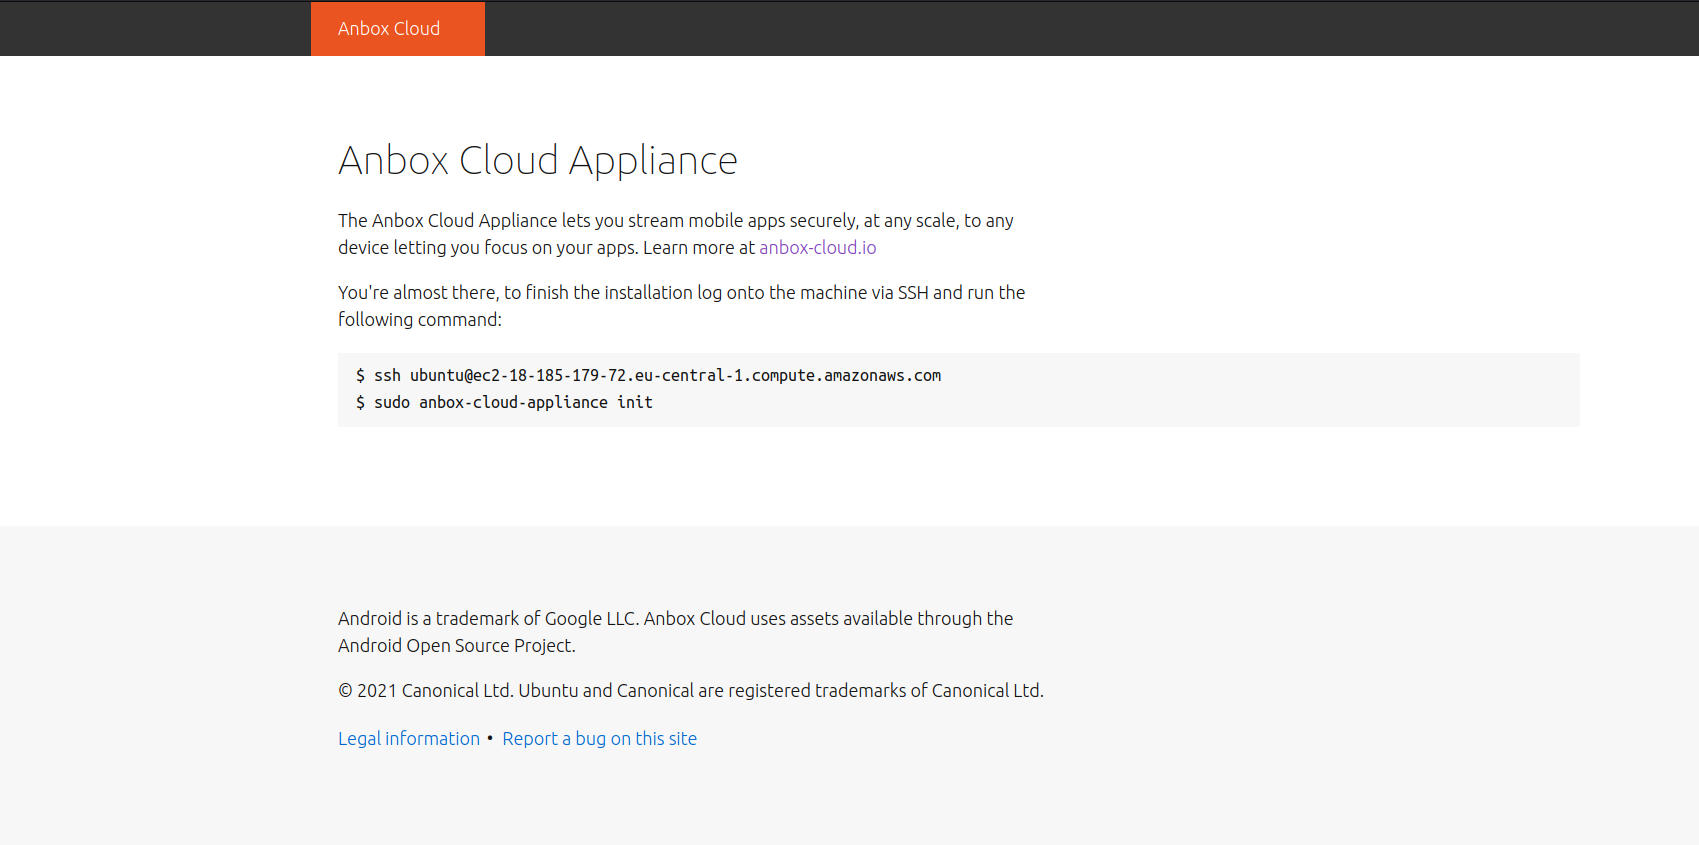
After the installation, access the appliance in your web browser by entering the IP of your machine (in the following steps referred to as https://your-machine-address). This web page provides status information for the following initialisation process.
By default, the Anbox Cloud Appliance uses self-signed certificates, which might cause a security warning in your browser. Use the mechanism provided by your browser to proceed to the web page.
1. Start the initialisation process
On your machine, enter the following command to invoke the initialisation process of the Anbox Cloud Appliance:
sudo anbox-cloud-appliance init
You will be asked a few questions. If you don’t want to make any specific changes, you can safely stay with the offered default answers. When the command returns, the initialisation process will run fully automatically in the background.
2. Monitor the progress
You can watch the status web page at https://your-machine-address for progress information.
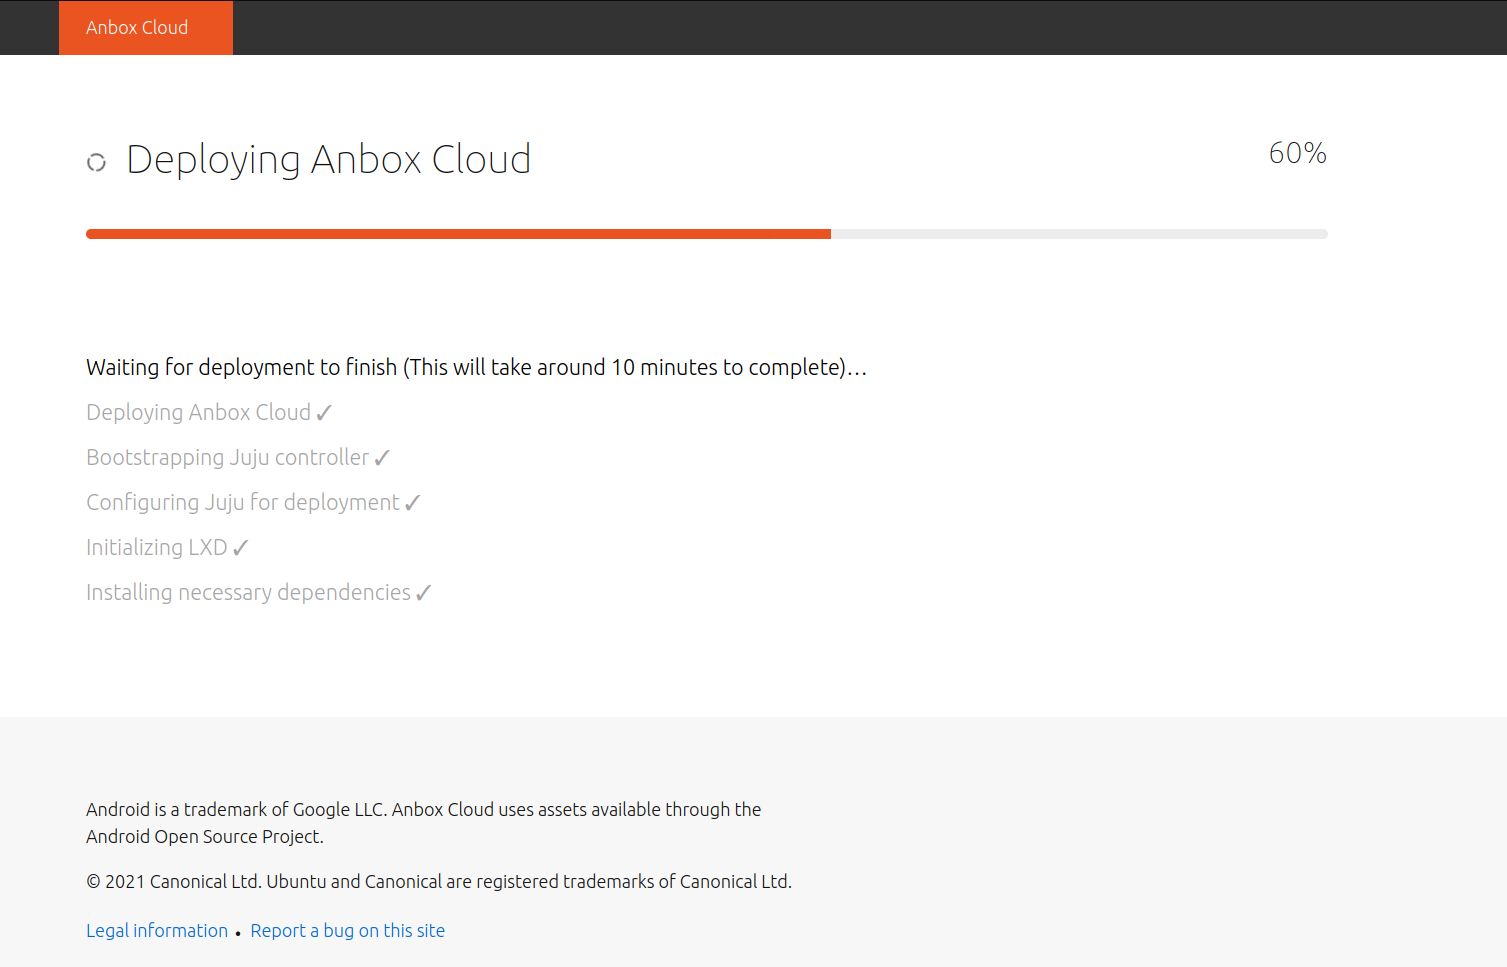
Alternatively, you can also use the anbox-cloud-appliance status command to monitor the progress information on the command line.
status: initializing
progress: 60
update-available: false
reboot-needed: false
version: 1.19.1
Register with the dashboard
Once the initialisation process has finished, you are presented with a welcome page on https://your-machine-address with instructions on how to register a user account with your installation. This registration is needed to access the web dashboard.
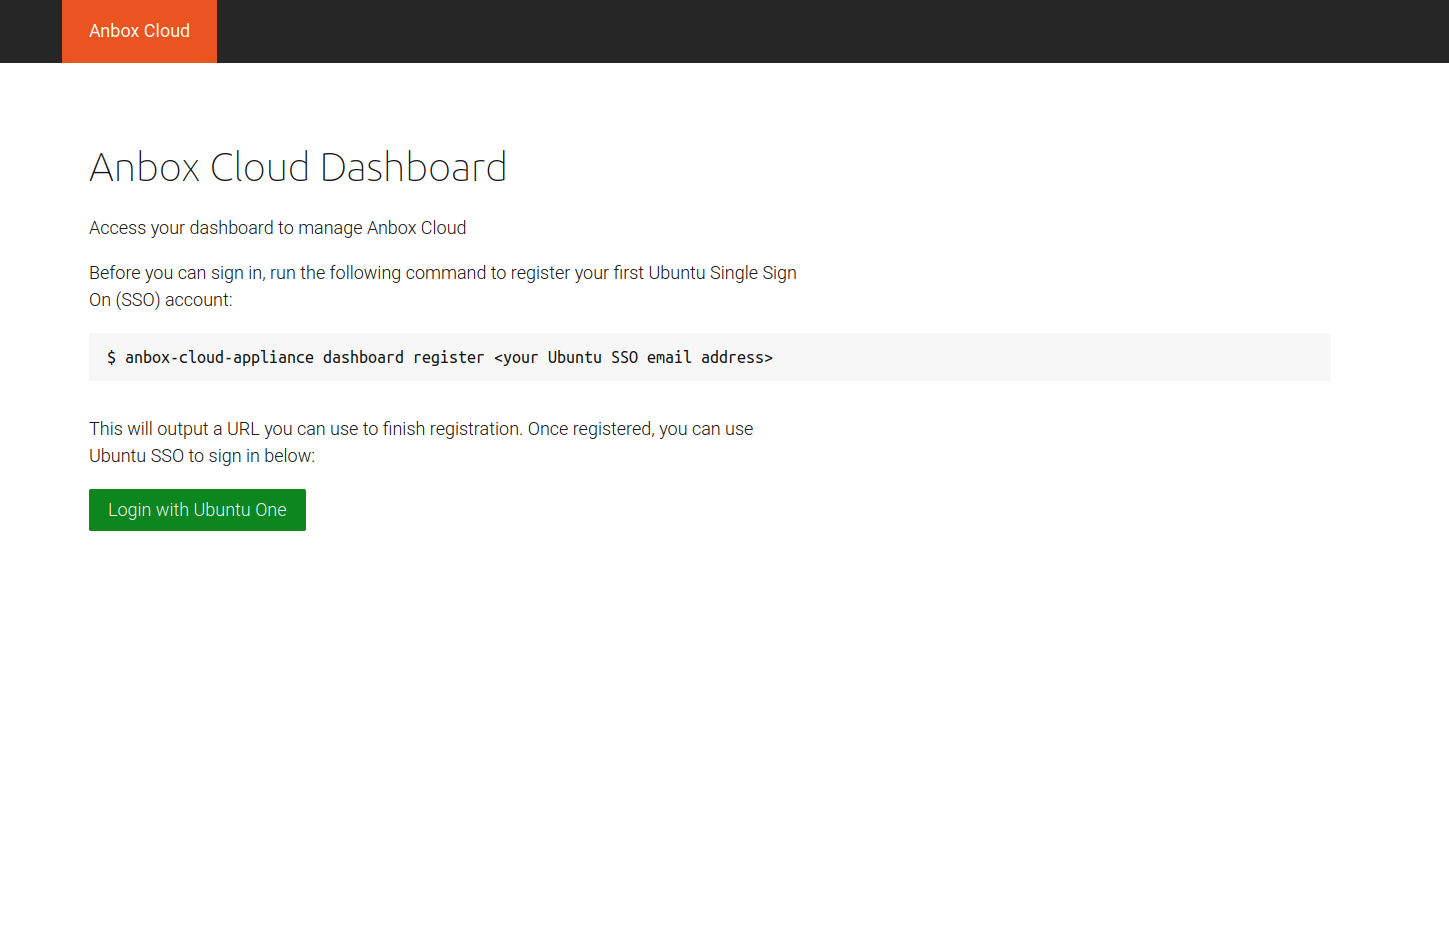
1. Register your Ubuntu SSO account
Enter the following command to register your Ubuntu SSO account:
anbox-cloud-appliance dashboard register <your Ubuntu SSO email address>
The output provides a link that you must open in your web browser to finish the account creation. By default, the registration link expires after one hour. After registering, you can log into the appliance dashboard with your Ubuntu SSO account.
2. Log into the appliance dashboard
After registering, you can log into the appliance dashboard at https://your-machine-address with your Ubuntu SSO account.
Done!
Your Anbox Cloud Appliance is now fully set up and ready to be used! Next, you should check out the Get started with Anbox Cloud (web dashboard) or the Get started with Anbox Cloud (CLI) tutorial to familiarise yourself with how to use Anbox Cloud.
You can find more information about how to use the appliance in the documentation. The appliance installation is nearly identical to installing via Juju, so all the commands and examples not relating directly to Juju will apply.